Key Features
- Seamless Integration: Easily embed Sage chats within any World Mini App.
- Custom Context Parameters: Tailor Sage’s responses based on Mini App specific data.
- Logs and Analytics: Track and understand what types of questions your users are asking.
Getting Started
1. Create a Sage Developer project
Go to the Sage Developer dashboard and sign in. Create a new project.2. Customizing Sage to fit your app
With a project created, head over to the project’s settings, this page is accessible by going into: Apps > Your App > Settings. (Navigation is available through the menu bar on the top right or the top left breadcrumbs) In this page you can find parameters to fine tune Sage to best interact with your users in the context of your app, a comprehensive description of these parameters is present below.3. Integrating Sage Support in your app
The final step to integrating Sage Support into your React application is to install and make use of theSageSupport component.
Add the npm package with the command:
YOUR_APP_ID is the App ID (number) you can find in the Sage Developer Dashboard (top right).
More configuration options for the component are available below.
4. Sage Support Link
Generate your app’s Support Link using the Support Link wizard and use it as the Support URL under Worldcoin Developer > Mini App > Configuration > App Store > Support > Link.Analytics
Once you’ve started using Sage Support in your Mini App, analytics are also available in the Sage Developer Dashboard, allowing you to identify the usage of Sage Support in your app and understand how users are using it. You can find more information about analytics below.This is all you need to get Sage Support working. If you wish to customize it
further, or better understand the various parameters continue reading below.
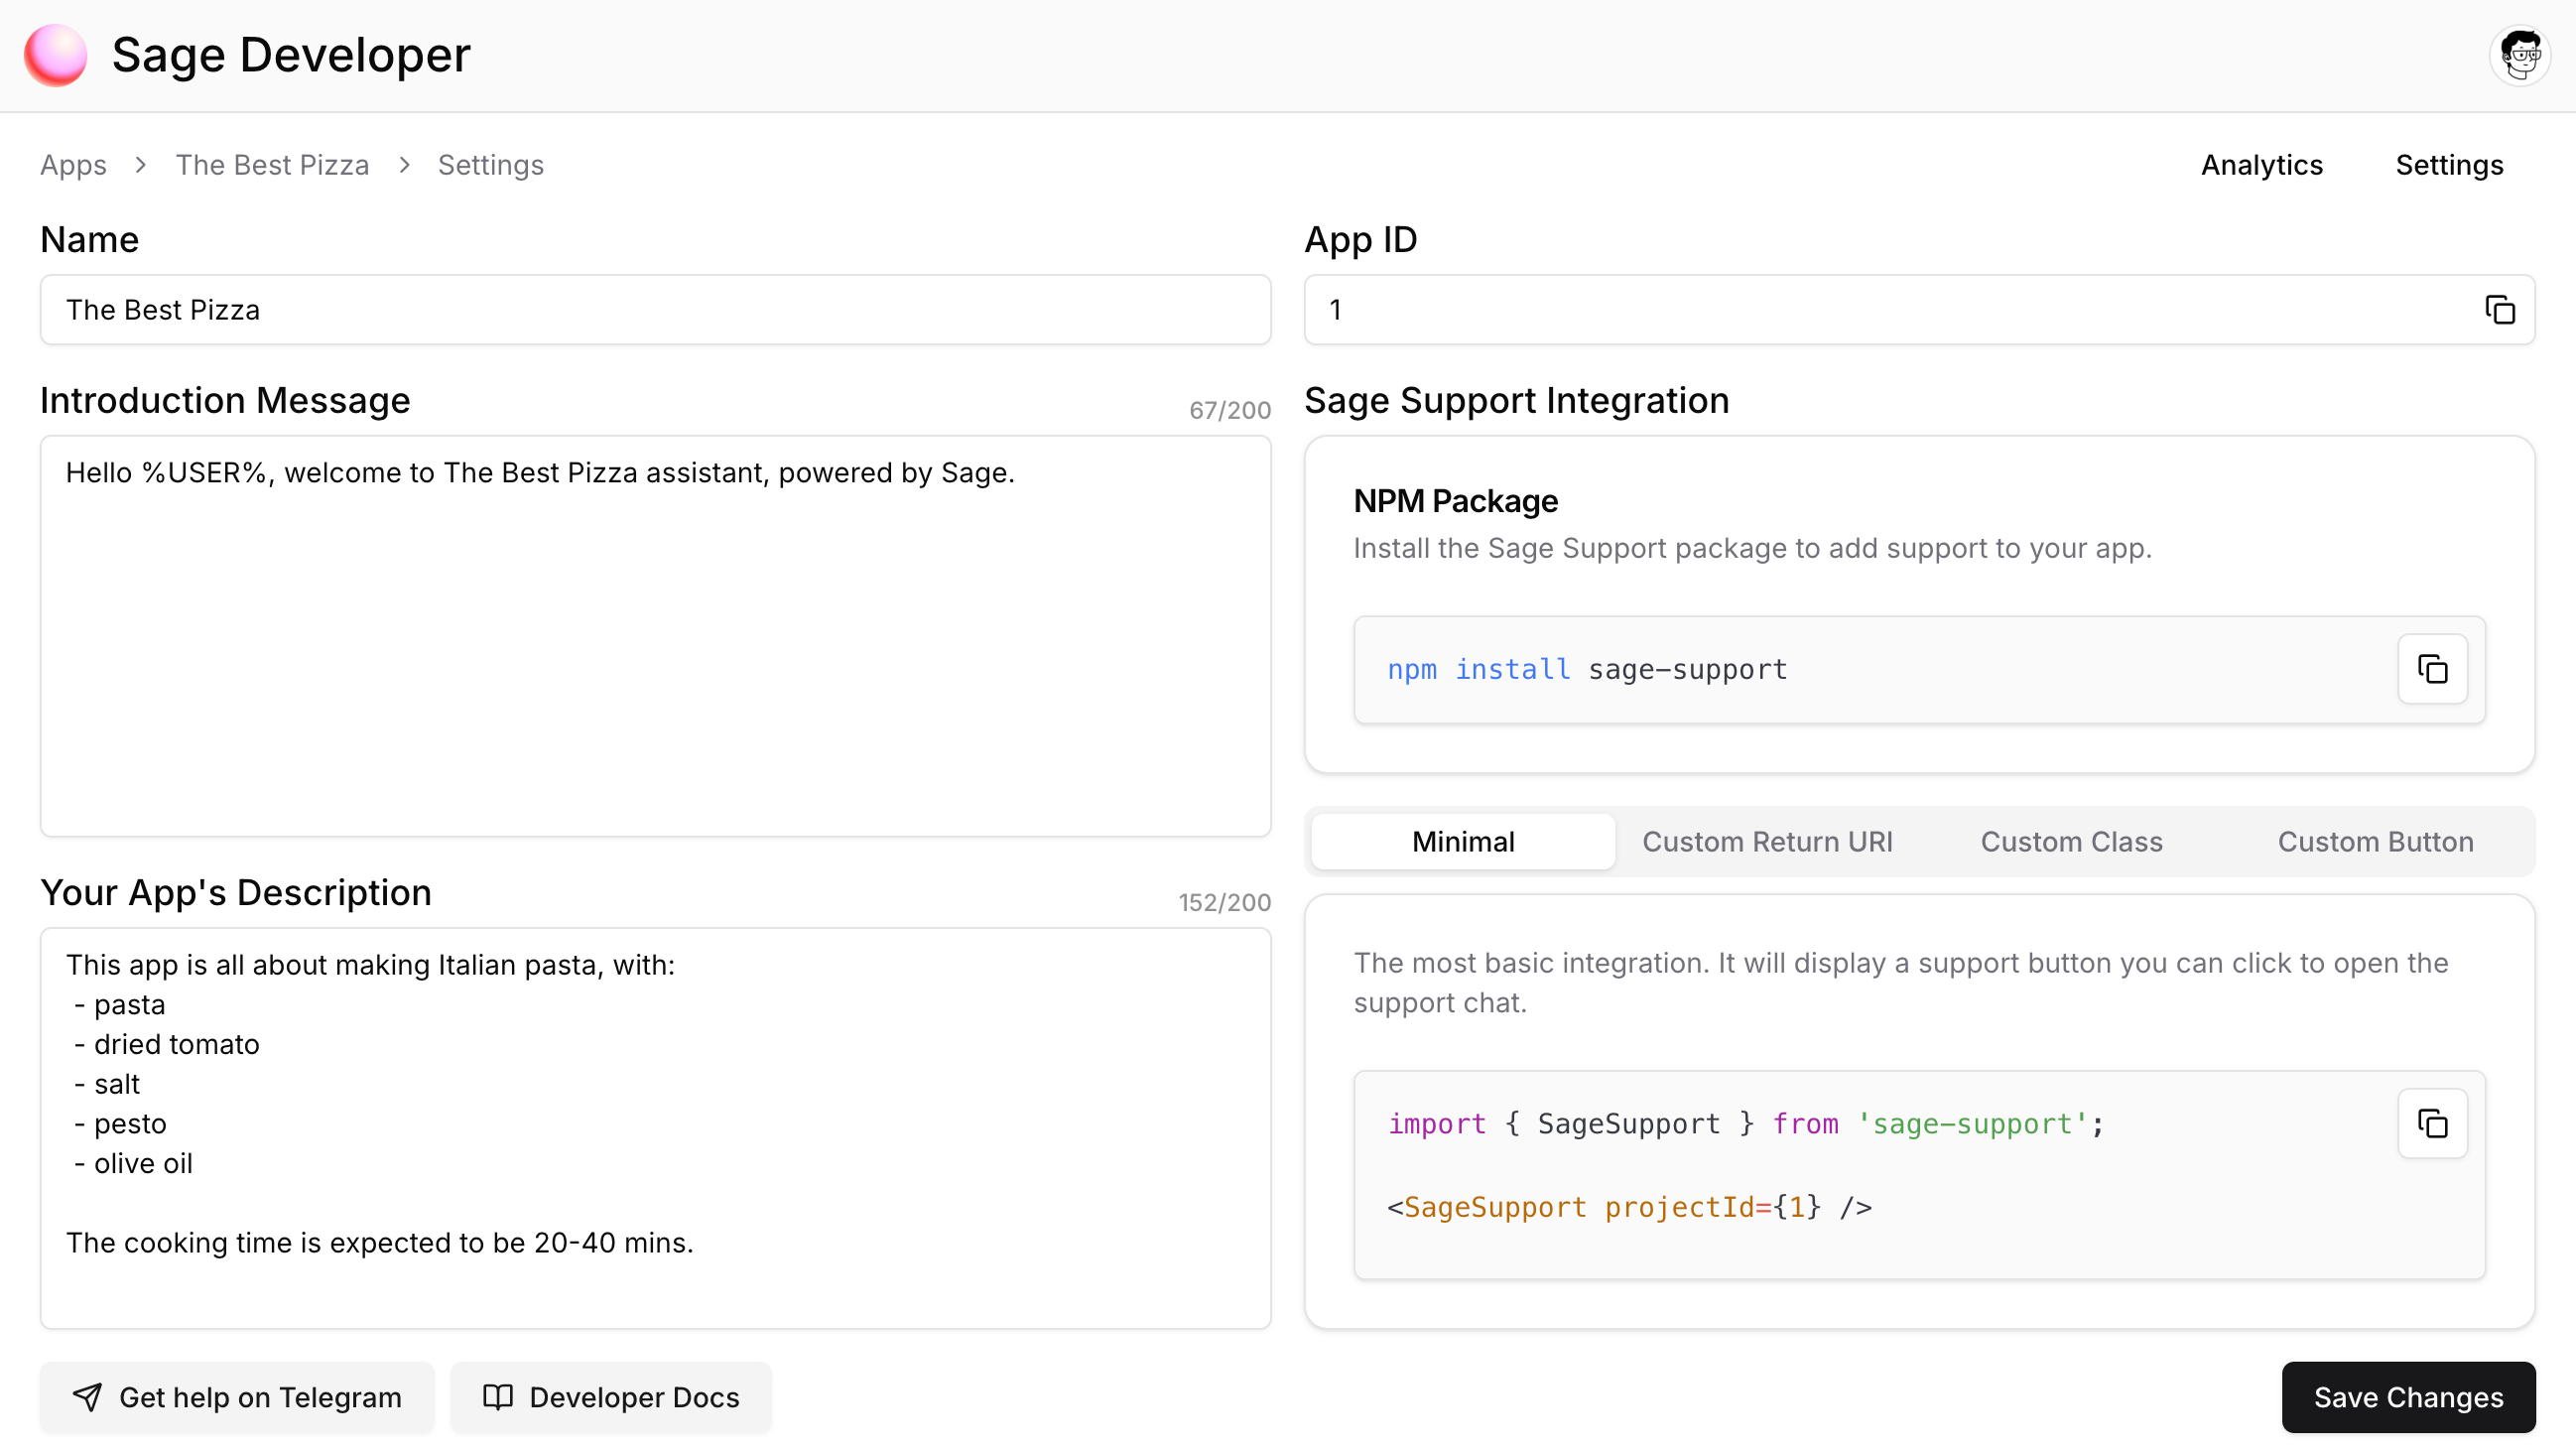
App Settings
Located at Apps > Your App > Settings, the Settings page allows you to fine tune the Sage Support assistant to meet the needs and context of your Mini App.App Name
This name only lives in the Sage Developer dashboard universe and serves the purpose of differentiating between multiple Sage Support integrations, it’s recommended that this field is set accordingly.
App ID
Uniquely identifies your Sage Developer App and is used to link your SageSupport component to the Sage Developer dashboard. This field is automatically generated and cannot be changed.
Introduction Message
Defines the first message to be sent by the Sage assistant once a new chat is created/open by a user. This field is also capable of encompassing a custom variable (%USER%) which Sage will replace by the user’s username.
App Description
Provide a solid description about your app and what it focuses on, this field is processed by Sage as an additional context parameter, and is useful to keep the assistant behavior and subject within the landscape of your Mini App.
App Analytics
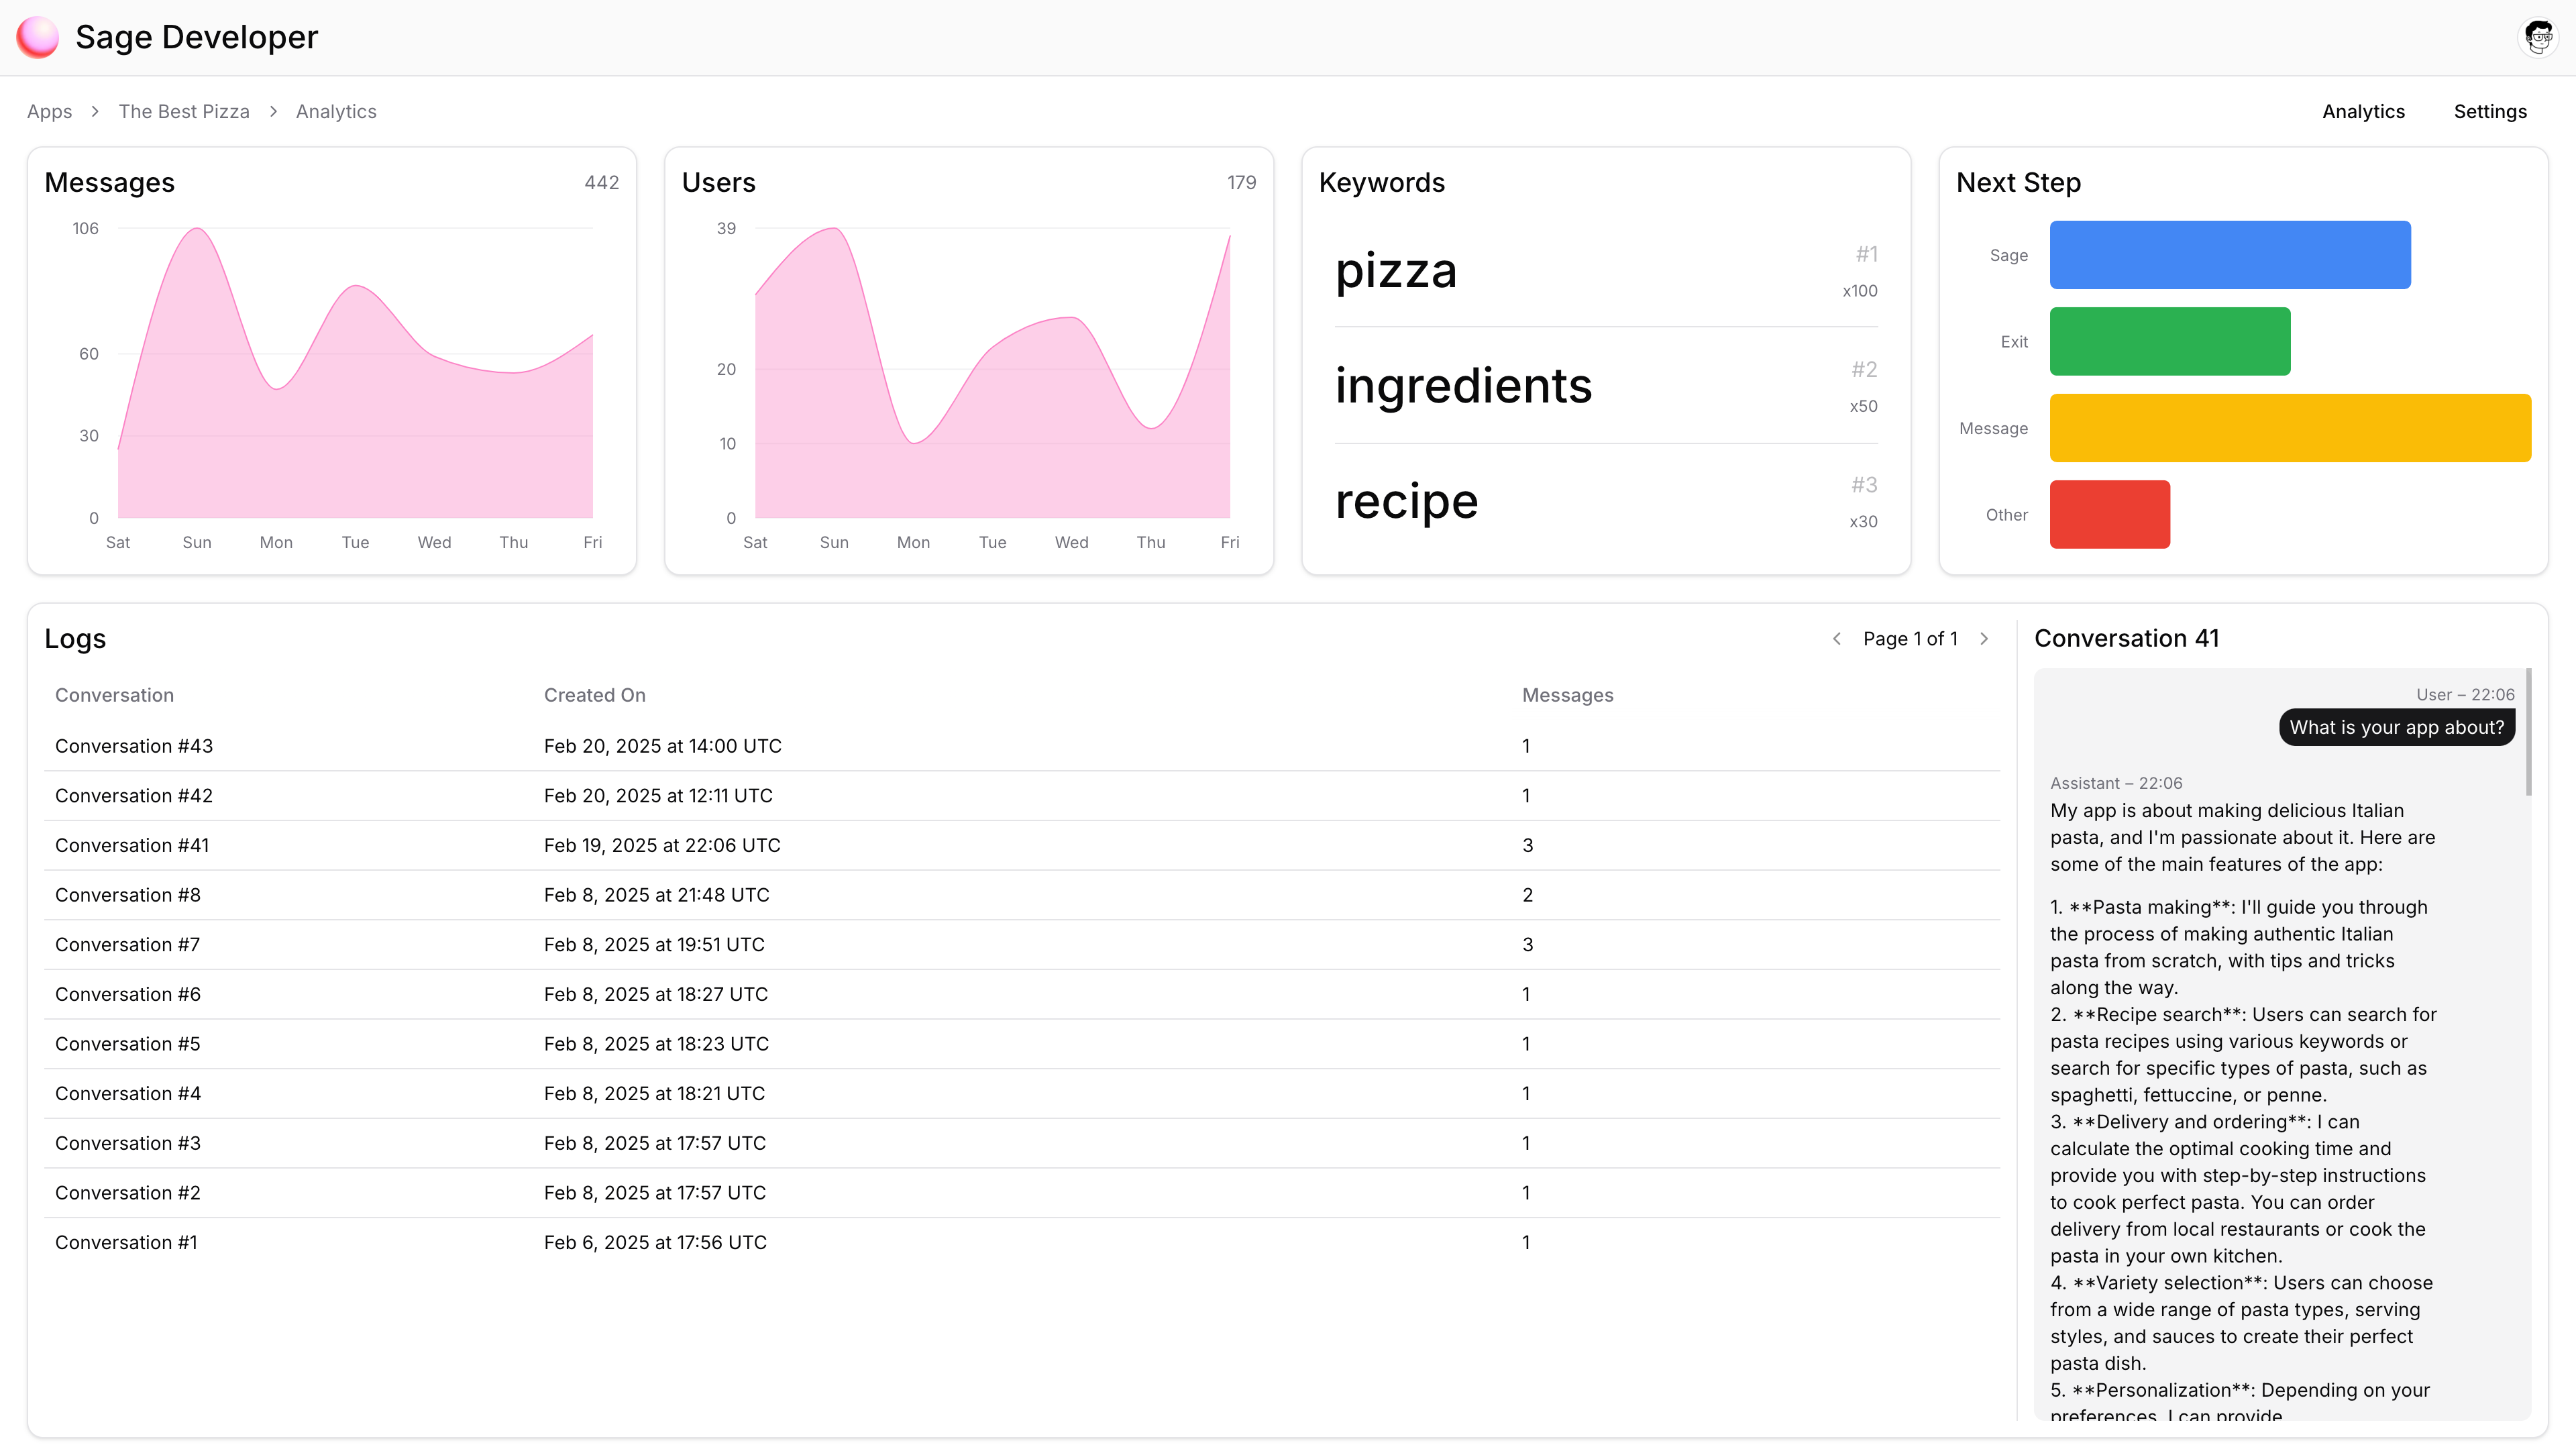
Located at Apps > Your App > Analytics, the Analytics page allows you to view statistics and analytic data about the usage of Sage Support within your Mini App.Messages
See how many messages were sent to Sage Support chats from your Mini App in each of the last 7 days.
Users
See how many users interacted with Sage Support chats from your Mini App in each of the last 7 days.
Keywords
Currently not available.
Next Step
Currently not available.
Logs
See how users chat with Sage Support inside your app, this data is shown anonymously and provides the developer with a more in-depth tool to explore the interactions between users and Sage Support.
SageSupport Component
Installation
To use the Sage Support React component you must first install it using npm (or your package manager of choice).Basic Usage
From the get go you can use Sage Support by using the basic implementation, the only mandatory parameter to be passed to the component is theprojectId. This ID (App ID) is retrieve from the Settings page in the Sage Developer dashboard.
Props & Personalisation
Other props allow you to customize both the aesthetic and behavior of the Sage Support Chat.Links your component to your Sage Developer project, used for analytics and
behavior.
Allows you to make use of the return button on the top left of the Sage
Support chat window. The value to be passed to this prop is a quick action
URL.
Allows you to pass custom CSS classes to affect the fallback default button.
Allows you to pass a custom React element to replace the default button.
Support Link
You can also integrate Sage Support directly into your World Mini App by using a Support Link. This allows your users to access Sage’s AI-powered support without requiring you to install any additional packages or components. The Support Link is a quick action URL that opens the Sage Support chat interface directly within the World App. When users click on this link, they’ll be able to ask questions and get support related to your Mini App. This link is particularly useful for developers to use Sage as their Mini App’s native Support link, available under Worldcoin Developer > Mini App > Configuration > App Store > Support > LinkBase URL & Parameters
The base URL to access a support chat is:https://worldcoin.org/mini-app?app_id=app_5dee2f19cd6eef599eb6ab275a0a7523&path=/support-chat
This support link, akin to the SageSupport component, accepts and requires some parameters to be passed, in this case URL Query Parameters, for the Support Chat to work like expected.
Links your Support Link to your Sage Developer project, used for analytics and behavior.
Allows you to make use of the return button on the top left of the Sage Support chat window by passing a Mini App quick action URI/URL. Due to some encoding functionalities and implementation caveats, the value to be passed to this parameter has to be formatted accordingly beforehand:
- The URL must be submitted to a UTF-8 encoding.
-
All ampersand characters (such as the one in
&path) have to be replaced with the sequence(amps).
worldcoin.org/mini-app space are not allowed.Support Link Generator
The Support Link Generator component would be inserted here in the actual
implementation.